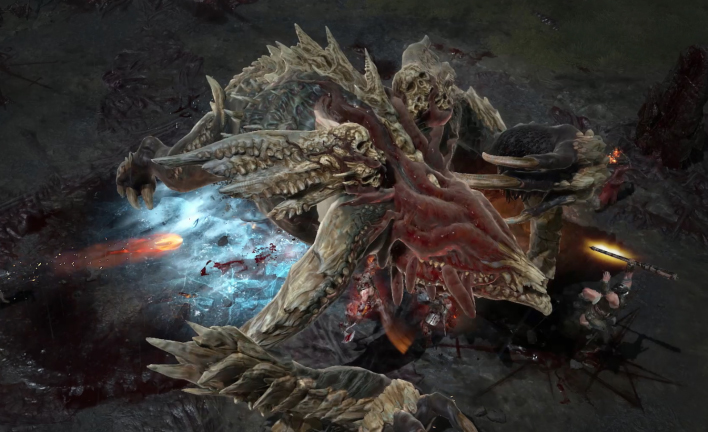
Diablo 4’s landscape is dotted with an array of special enemy types that players will find themselves facing off against – these are the Bosses. Far from your standard adversaries, bosses are unique entities with their own exclusive moves, and they exhibit significantly greater health reserves. The triumph over certain bosses is crucial as it paves the way for the unlocking of more expansive areas and further quests, aiding in the advancement of the game’s narrative.
The yellow bar, strategically located beneath the Boss’s health bar, is an essential tool for dealing with these powerful foes. By harnessing the power of staggering mechanics like stun or freeze, this bar can be gradually filled. Upon reaching its capacity, the boss is staggered, offering a momentary window for players to launch an unfettered assault. Interestingly, a good number of bosses follow scripted patterns – losing certain limbs or abilities once staggered – this ultimately makes the encounter somewhat less daunting.
A notable boss in Diablo 4 is the “Merinth of the Deep, Drowned Witch.” This formidable adversary is found within the confines of the Drowning Caverns. Defeating bosses such as Merinth of the Deep, Drowned Witch not only enables you to complete quests and progress through the game but also rewards you with unique equipment.

Details & Locale of Merinth of the Deep, Drowned Witch
Location: Nestled within the Drowning Caverns
Defeating this boss concludes the “Call of the Deep” quest.
It should be noted that facing this boss is non-negotiable.
Bounties from Defeating Merinth of the Deep, Drowned Witch
Rewards are bestowed upon the victorious player post-defeat of this boss.
Tactical Approach
Merinth of the Deep, Drowned Witch is proficient in both close-combat and ranged attacks, allowing players to select their positioning during the battle. It’s advisable to stay in constant motion and avoid the slow pools, as they can compromise your mobility and inflict damage through a torrent attack. The summoning of minions necessitates immediate action – prioritize their elimination to prevent further damage.
Attack Mechanisms & Defensive Maneuvers
Slow Pools: When Merinth raises its right arm, it gives birth to pools that reduce your speed if you tread over them. The counter to this would be to maintain a safe distance from these pools. This is an optimal time to strike as Merinth stays stationary.
Torrent Attack: Merinth is capable of manifesting a damaging water torrent from the Slow Pools that repels the player. The best defense here is continuous movement to evade the attack.
Water Wave: Merinth can direct a damaging water wave towards the player. To evade this, one should move laterally, either to the left or right.
Summon Minions: Minions can be conjured from beneath the pools by Merinth. These minions launch ranged attacks. The recommended strategy is to target the minions first before turning your attention to Merinth.
Ashava The Pestilent: The World Boss
In the vast world of Diablo 4, you will encounter a variety of distinctive adversaries. Among them is the formidable World Boss known as Ashava The Pestilent. This special class of enemy dwells in the region of Caen Adar, north of Corbach. Victorious battles against such bosses grant players the opportunity to complete quests, progress further in the game, and acquire unique pieces of equipment.
Ashava The Pestilent: Locale & Intel
Location: Resides in Caen Adar, north of Corbach
Overcoming this boss marks the completion of the World Event titled “Ashava The Pestilent.”
Engaging with this boss is optional.
Rewards Bestowed by Ashava The Pestilent
Various rewards await those who manage to vanquish this formidable opponent.
Tactical Assessment
As a World Boss, Ashava The Pestilent necessitates a combined effort of multiple players for its defeat. It primarily employs melee attacks, with the exceptions of Poison Breath and Arm Blades attack. When Ashava is staggered, one of its arm blades will break. If both arm blades are destroyed in this manner, Ashava’s ability to perform the arm blade attack will be annulled, granting increased flexibility to ranged heroes.
Offensive Abilities & Effective Counters
Bite: Ashava delivers a powerful bite to any player standing in front, causing considerable damage. Unless you are in the role of a tank, it is recommended to keep your distance from Ashava to evade this attack.
Smash Attack: Ashava raises its right hand and delivers a ground smash, inflicting area-of-effect damage. An effective counter is to dodge to either side when you witness Ashava’s hand ascending.
Leap Attack: Ashava employs this move to close the gap with ranged casters, leaping towards them to strike. An effective countermeasure would be to dodge the leap and quickly relocate to a safe distance before resuming the offensive.
Poison Breath: Ashava’s rib cage will radiate a green hue, followed by a venomous spit attack. The venom remains on the ground, causing persistent poison damage. The recommended counter is to move laterally to the left or right as soon as you witness the green glow, also steering clear of the venomous patches on the ground.
Arm Blades Attack: Ashava executes a 360-degree attack with its arm blades, a high-damage move with an extended reach. The optimal defensive move is to wait until the arm blades approach, then perform a dodge to evade the damage.
